Monday, September 29, 2014

Pumpkin Pancakes

Pumpkin pancakes! A perfect breakfast (or dinner) for fall!! :) We enjoyed them for tonight! 

Here's what you need:

1 1/2 cup whole wheat flour
2 tablespoons coconut sugar
2 teaspoons baking soda
1/2 teaspoon salt
2 tablespoons ground cinnamon
1 cup milk
1/2 can of pumpkin puree
2 tablespoons coconut oil
1 teaspoon vanilla extract

What to do:

1. In a large bowl, whisk together the flour, coconut sugar, baking soda, salt, and cinnamon.

3. In a medium bowl, whisk together the milk, pumpkin, coconut oil and vanilla extract.

4. Combine the wet and dry ingredients, and whisk until completely combined.

5. Scoop a large spoonful of the batter onto a nonstick pan. Cook for 2 to 3 minutes on low, or until the edges are browned. Flip and cook on the second side for 2 minutes, or until golden brown.

6. Enjoy! :)


Homemade sunflower seed butter


Well, making your own sunflower seed butter is quite a long process if you use your own sunflower seeds. And, if you are like me and leaves the shells on, it will take a bit longer. Lol. You will get a crunchy sunflower seed butter though, which is still pretty good. I am going to take through this process step by step if you grew your own sunflowers and left the shells on the seeds. 

**Sunflower seed butter is a perfect alternative to peanut butter. My son is allergic to both peanuts and tree nuts, so sunflower seed butter is a favorite at our house. I thought it would be even to make my own!**


Anyways.... Let's get started! 


Here's what you need for the sunflower seed butter:

Note: You will need olive oil and salt to roast the seeds, but the measurements are in the steps for that.

3-4 cups sunflower seeds
1 cup water
4 tablespoons olive oil
2 tablespoons coconut oil
1 teaspoon salt


What to do:

1. First, grow your sunflower. If you plant in late May, they should be ready to harvest by mid September. Yes, our sunflowers grew 10 feet tall!! Lol. 


2. Then, cut the sunflower heads (flower) off and hang them upside down in a cool place to dry. Leave them anywhere from 1 day to 2 weeks depending on how damp your sunflowers are...

Note: We hung out our sunflowers in our creepy 150 year old basement. Lol.


3. Now, pluck all of the seeds off of the sunflowers, and place them in a large bowl with water and 1 tablespoon of salt for 24 hours! 

Note: Plunking the seeds does take a long time, and it is pretty annoying. You are not alone. Lol. ;)


4. Now, drain the water from the sunflower seeds, and place them back in the bowl with 2 tablespoons of olive oil. Mix until all the sunflower seeds are coated in olive oil. 

5. Preheat oven to 300F degrees, and spread the sunflower seeds across a cookie sheet.


6. Bake for about 45 minutes until a majority of the seeds are golden brown. 


7. Once cooled, place them into a food processor or blender with 1 cup of water and 1 teaspoon salt. Turn the food processor or blender on high, and let the sunflower seeds grind up for about 18 minutes. 

Note: You might need to stop periodically if your food processor or blender gets too hot. It is also a good idea to stop and stir the mixture periodically too.
 

8. Once the majority of the seeds have been ground up, add 4 tablespoons of olive oil and 2 tablespoons of coconut oil. Blend on high again for about 12-15 minutes.

Note: You might need to stop and periodically stir the mixture.

9. Place in a jar and refrigerate! You now have sunflower seed butter!!!

Monday, September 22, 2014

Press Here- The Dot Game


Press Here is such a fun book!! Adults and kids will love it! You start by pressing the yellow dot on the cover, and it takes you on a fun journey. It involves shaking the book, tilting the book, etc. which in turn moves the dots, multiplies the dots, changes their colors, and more! 

We read this week because we were learning about the letter D! D for dots! Harry loved this book. :) 


Book project:

To go along with the book, I cut out 30 dots and placed on a cookie sheet with shaving cream. This is a great sensory activity!! :)

We took turns picking up the dots with tweezers, and we also sorted them by color and counted the dots. Harry really enjoyed this activity! 

Sunday, September 21, 2014

Pumpkin Chocolate Chip Cookies


I love fall..  It is such a pretty time of year, and I love Halloween and anything pumpkin. I have been craving pumpkin chocolate chip cookies, and since summer is officially over, I decided to make them!! Yummy!!! They  are even allergy friendly for my son who is allergic to peanuts and tree nuts.

Here's what you need :

2 cups pumpkin puree
1/2 cup coconut sugar
1/2 cup vegetable oil
1 egg
2 cups whole wheat flour
2 teaspoons baking soda
2 tablespoons cinnamon
1/2 teaspoon salt
1 tablespoon milk
1 tablespoon vanilla
2 cups semisweet chocolate chips

What to do :

1.  Preheat oven to 350F degrees.

2. In a small bowl combine the pumpkin, coconut sugar, milk, vegetable oil, vanilla, and egg.  Set aside.

3. In a large bowl combine the flour, baking powder, cinnamon, chocolate chips, and salt.

4. Mix the wet and dry ingredients together into the large bowl.

5. On a lightly greased cookie sheet, scoop small balls of dough onto it.

6. Bake for about 18 minutes.

7. Cool and enjoy! :)


Thursday, September 18, 2014

Breast Milk Bread


What do you do when you have tons of extra breast milk in the freezer?! You make bread. It is super easy to make too and extremely healthy for you! 

I might be crazy because I use breast milk for everything. Lol!! I have made lotion, pudding, muffins, crackers, cheese, and bread! (See my other recipes)


Here's what you need:

8oz of breast milk
1 1/2 cup whole wheat flour
2 teaspoons cinnamon

(You don't need any sugar because breast milk has a sweet taste.)

What to do:

1. Preheat the oven to 350F degrees. 
2. Mix everything together into a large bowl. 
3. Then, pour into a lightly greased 8x8 pan. 
4. Bake for about 18 minutes. 
5 . Cool and enjoy! :)

See... So simple!! :)

Wednesday, September 17, 2014

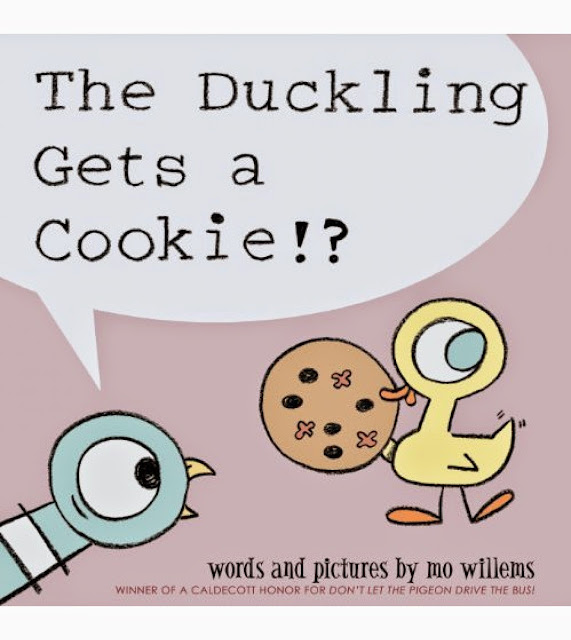
The Duckling Gets a Cookie!?


So, Harry and I joined an online book club for kids! Fun!! Each month has a different author to explore. You pick a book by that author, read the book, and do a project, craft, or activity about the book. 

This month's author is Mo Willems. I picked the book "The Duckling Gets a Cookie!?" because it went perfectly with the letter C, and I thought Harry would enjoy this story. Sucess!! :) 


Here's what we did for the book: 

*First, we read the book together and looked at the pictures. Then, Harry worked on this tracing worksheet. 


*Next, I cut out circles from paper plates. Then we decorated the cookies with chocolate chips and sprinkles by coloring them with markers. I also added letters to the backs of them. 


* Then using an old coffee can, I made a cookie jar, and I placed the cookies inside.


*Then Harry and I took turns asking for cookies, BUT we had to be polite and ask nicely for the cookies, just like the duckling. This was a lot of fun! If Harry didn't say please, then he couldn't get a cookie. This turned into quite a fun game. I would play tricks on him by not using my manners, just to see if he was paying attention. Lol. It worked!! ;)


*Once we were finished giving each other cookies, we flipped the cookies over. A majority of the cookies had letters on them. I then helped Harry practice spelling some basic words such as dad, mom, and Harry. I discovered that Harry can spell his own name!!!! Wow! How exciting!!! 

All in all, this was a great book and fun activity! It taught Harry the importance of using his manners and the importance of asking politely for things. :)


Monday, September 1, 2014

Firework Ice Chalk


Firework Ice Chalk! This is so much better than the obnoxious fireworks that continously go off throughout the entire summer! Lol. Since when did the Fourth of July turn into a summer long celebration?! ;)

 This is also also super easy to make and a fun activity to do! You need water, food coloring, baking soda, kids' washable paint, and vinegar. 


 What to do:

1. Fill up an ice cube tray with water, and then add 2 drops of food coloring of your choice to the water.

2. Add baking soda and a little bit of paint to the water, and stir until dissolved. 

3. Freeze!

4. Once the cubes are frozen, take them outside and place on the ground or paper.

5. Fill a bottle up with vinegar, and squirt the vinegar onto the cubes. It fizzes creating a firework or explosion. It's super cool!! :)